|
Very simple but perfect ! |
The keel is in Carbon, very well design, and offer lots of surface and place for the different radio elements |
13 mm servos can be used, but I prefered the new s3150 from futaba which is only 10.8 mm large |
The servos is a s3150 from Futaba, an excellent and powerfull 10.8 mm servos according to the test conducted by JL Delort, Olivier Segouin and Patrick Césarato. |
|
Wing connectors are supplied in the kit. I always use hot glue to mould the connector. This is rock solid and easy to remove |
connectors are epoxied in the fuselage |
Nothing to do on the tailplane. |
No tube to maintain the tail in place |
|
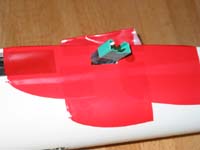
I made a small mount in aluminum for the switch ... |
which take place horizontally above the ballast tube. Easy to access. |
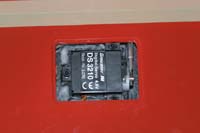
Servo mounts come from www.servoframes.com. I use g3210 servos for the ailerons |
and DS368 for the flaps, with the corresponding servos frame |
|
very weel though and good quality too. |
servos wires and connectors are prepared outside the wing |
The connector is then epoxied in place. |
then come the important step that consists in putting the servos in place one by one and in making the surface control linkage. |
|
The system supplied in the kit is great, easy to setup. |
Once the servos in place |
It confirms that the servos horn is a little bit too long to use the original servo cover (flat) |
 Same
for the DS368. Same
for the DS368. |
|
I used a servos cover coming from an Ellipse 4 mould copy. Very convenient. this is the only negative point I found with the Aris. They should provide such servo cover |
Radio installation is easy, plenty of place. |
I used a V-limiter to stabilise the voltage coming from the 5 cells battery |
the receiver is an excellent Schulze |
|
I also use a battery voltage indicator. The battery is a 5 x 2300 mAh Sanyo NiMh |
Very few lead (about 90gr) are needed to obtain the correct CG. |


Servomances is an excellent software and database developped by 3 french modellers. they first setted up a test protocol that they followed in details for every servos tested. This software (in french) is downloadable on Olivier Segouin's website. Hereafter are the 3 test results for the servos I used on the Aris. the Hitec is probably different from the Graupner G3210, even if they use the same gears and servo case.


Copyright © 2005
Planet-Soaring.com
No
commercial use or publication (e.g. on other www or ftp sites, print media)
without a written consent.