It is not easy being a student! Especially when you have aircraft modelling as a hobby and want to make the most of both worlds.
I came from France to study in UK three years ago and got into the hobby not much later. Since then, I have acquired a few e-powered gliders and aircraft, crashed some of them…but always had a good time. One of the things you have to face when you get into the hobby is the need to go bigger.
I started with a Great
Planes Spectra 2.0m, then got an Altus XL (in fact a 1.8m Highlight), now
own a Jazz Xtreme flying wing, an Easy Street…but with my flying skills getting
better, I had to go for a 2.5 m or so.
Airtech has
a very wide range of gliders (distributed in UK by South Coast Sailplanes),
some of them able to be e-powered. One of my requirements was that it should
have an electric motor (possibly brushless), offer good aerobatics, stay up
in light lift conditions and behave well in the windy conditions we often
meet here in UK.
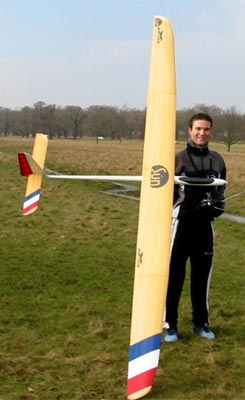
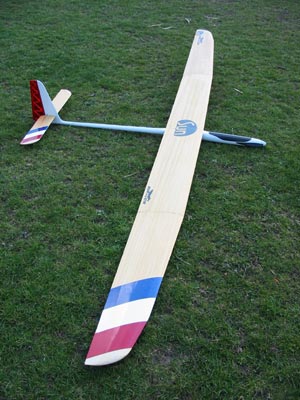
As an answer,
I was advised to go for their Sun, an all-round slope and field soarer that
can be very fast (or very slow) and a very efficient thermal soarer. This
is the same glider used by Airtech in F3F/F3J competition inFrance to compete
against all-moulded aircraft.
After much
thought and a lot of overtime to put the money together, I took the opportunity
of a trip back home to visit to Airtech in their workshop. My Sun was ready,
with its white fuselage and wooden wing, along with the Multiplex Micro 3BB
for the flaps and ailerons, Graupner C3341 for the elevator and rudder. The
receiver chosen was the Multiplex Micro IPD 7.
The Kit
The
first impression when you receive the kit is that this is a truly quality
product.
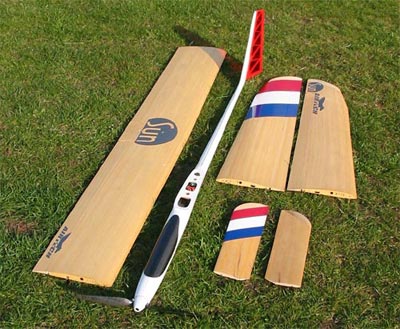
The
box contains:
ü A 1.6 m
centre wing panel which is already made (Obechi skinned rigid foam). Two holes
have been drilled in its centre for the wing screws. Some aluminium tubes
have been moulded for the wing tips carbon joiners
ü Two 85 cm
wing tips similarly made with tubes as well.
ü The two pieces that make the elevator (all moving and removable, made in a similar manner to the wing).
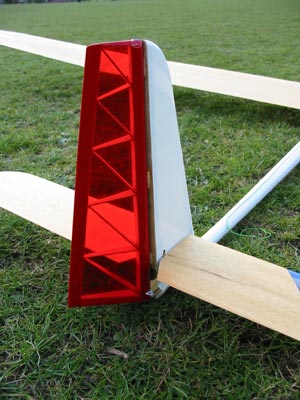
ü A built
up balsa rudder, providing the lightweight required at the tail end of the
aircraft. The rudder can be made removable for ease of transport and the fixation
system is provided.
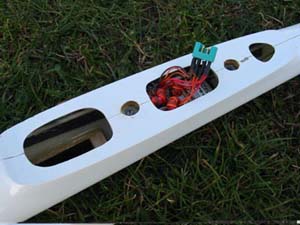
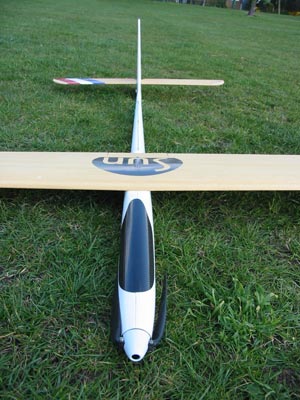
ü The fuselage
is made of glass reinforced with Carbon/Kevlar. It comes in a choice of 5
different colours: white, red, yellow, orange and blue. A carbon canopy is
also included and already trimmed. The snake outers are already in place with
the tail plane crank and piano wires already connected.
ü All the
accessories including transparent servos covers, epoxy horns, 2x8mm carbon
wing joiners, aluminium rods and tubes, 5mm plywood…
Building
All
the gluing on the Sun is done with epoxy 5 minutes.
The wings
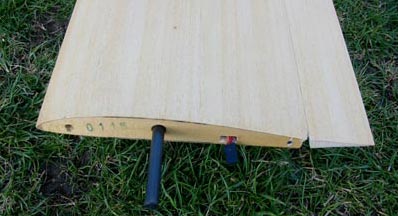 The
first job is to position the wing:
The
first job is to position the wing:The pins that hold the wing tips in position with respect to the centre wing panel then have to be fixed.
The tail
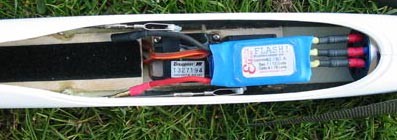
The fuselage
ü One for the receiver, which is attached to the tray with a rubber band and placed in between the two holes for the screws.
ü One for the battery with some velcro on it and, since I do not trust velcro for 100%, I secured it with a rubber band at one end so that the battery does not move in flight. The battery tray is positioned at the front of the receiver and behind the servos.
 |
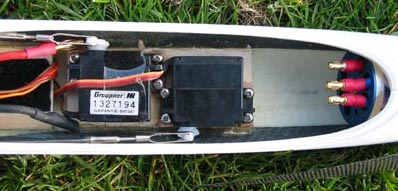 |
Radio installation
I installed
a Multiplex high voltage plug to connect all the wing servos to the receiver.
This allows to quickly plug 4 servos at the time into the receiver.
I did not cover my model (simply varnished it, which saves some weight as well as looks good) but this can be done easily with vinyl or heat shrink covering.
Flying
 All
the throws were verified twice (and set to the manufacturer’s recommendation),
my radio programmed, I made sure everything was a tight fit in the fuselage,
the centre of gravity positioned…
All
the throws were verified twice (and set to the manufacturer’s recommendation),
my radio programmed, I made sure everything was a tight fit in the fuselage,
the centre of gravity positioned…
First impression was a good climb rate, but I did not get that rocket-like climb told by the manufacturer. Nevertheless, the handling was easy and no trim was needed (apart from the one the position the elevator).
I ran the receiver antenna outside the fuselage as an attempt to solve the interference problem, programmed some down elevator (2mm) in the butterfly mix…and the third flight was magic. With no interference, a more powerful battery (charged on-site), I finally got the rocket-like climb. After 30 seconds of motor, the Sun had sufficient altitude to make some tests. With some down-flaps, it becomes a real thermal soarer and can be slowed down a lot.
With no flap mixing, it is a very fast model and produces a magic whistle (probably due to the spinner). The basic aerobatics are good too (with some aileron to flap mixing) considering its size, but it needs a lot of altitude since it comes down very quickly. I also played with the elevator to flap mix (F3F style) and the turn are very tight but not advised from a flat field.
Conclusion
 After
some thought regarding its size, the Sun turned out to be a safe upgrade to
a 1.8m glider. A good experience with building and flying with ailerons is
needed before having a Sun but I think it is very easy to handle and therefore
would make a great model for someone who is looking for an upgrade to a 2.0m
glider. A competition flyer will also enjoy the Sun because it can be very
fast and a great performer once correctly set… and at this price, one is not
scared to take it to the field on a busy and sunny day whilst moulded are
grounded.
After
some thought regarding its size, the Sun turned out to be a safe upgrade to
a 1.8m glider. A good experience with building and flying with ailerons is
needed before having a Sun but I think it is very easy to handle and therefore
would make a great model for someone who is looking for an upgrade to a 2.0m
glider. A competition flyer will also enjoy the Sun because it can be very
fast and a great performer once correctly set… and at this price, one is not
scared to take it to the field on a busy and sunny day whilst moulded are
grounded.
Name: Sun
Model type: Electric F3J glider (also
called F5J)
Manufacturer: Airtech (www.airtech-rc.com)
UK Distributor : South Coast
Sailplanes (www.south-coast-sailplanes.com)
Tel: 01202 395 707
Price: 379 euros + p&p (about
£240)
Construction: Carbon/Kevlar reinforced
Epoxy fuselage
Obechi skinned
wing
Wingspan: 3.33 m (130 “)
Length: 1.54 m (60.6 “)
Weight: 2.81 Kg (99.1 ounces)
Wing area: 65 dm2 (1007.5
sq inches)
Wing loading: 43.2 g/dm2 (0.098
oz/sq inch)
Wing section: S3021
Motor & Controller: Brushless Electronic
Model Elios 25 geared 3.7:1 with Flash 40/60 controller
Receiver: Multiplex Micro 7 IPD
Propeller: RFM 14.5 x 10” slim
Servos: 2 x Graupner C3341 +
4 x Multiplex Micro 3BB
Control functions: Rudder, Elevator, Aileron,
Flaps, Throttle
No commercial use or publication (e.g. on other www or ftp sites, print media) without a written consent.